-
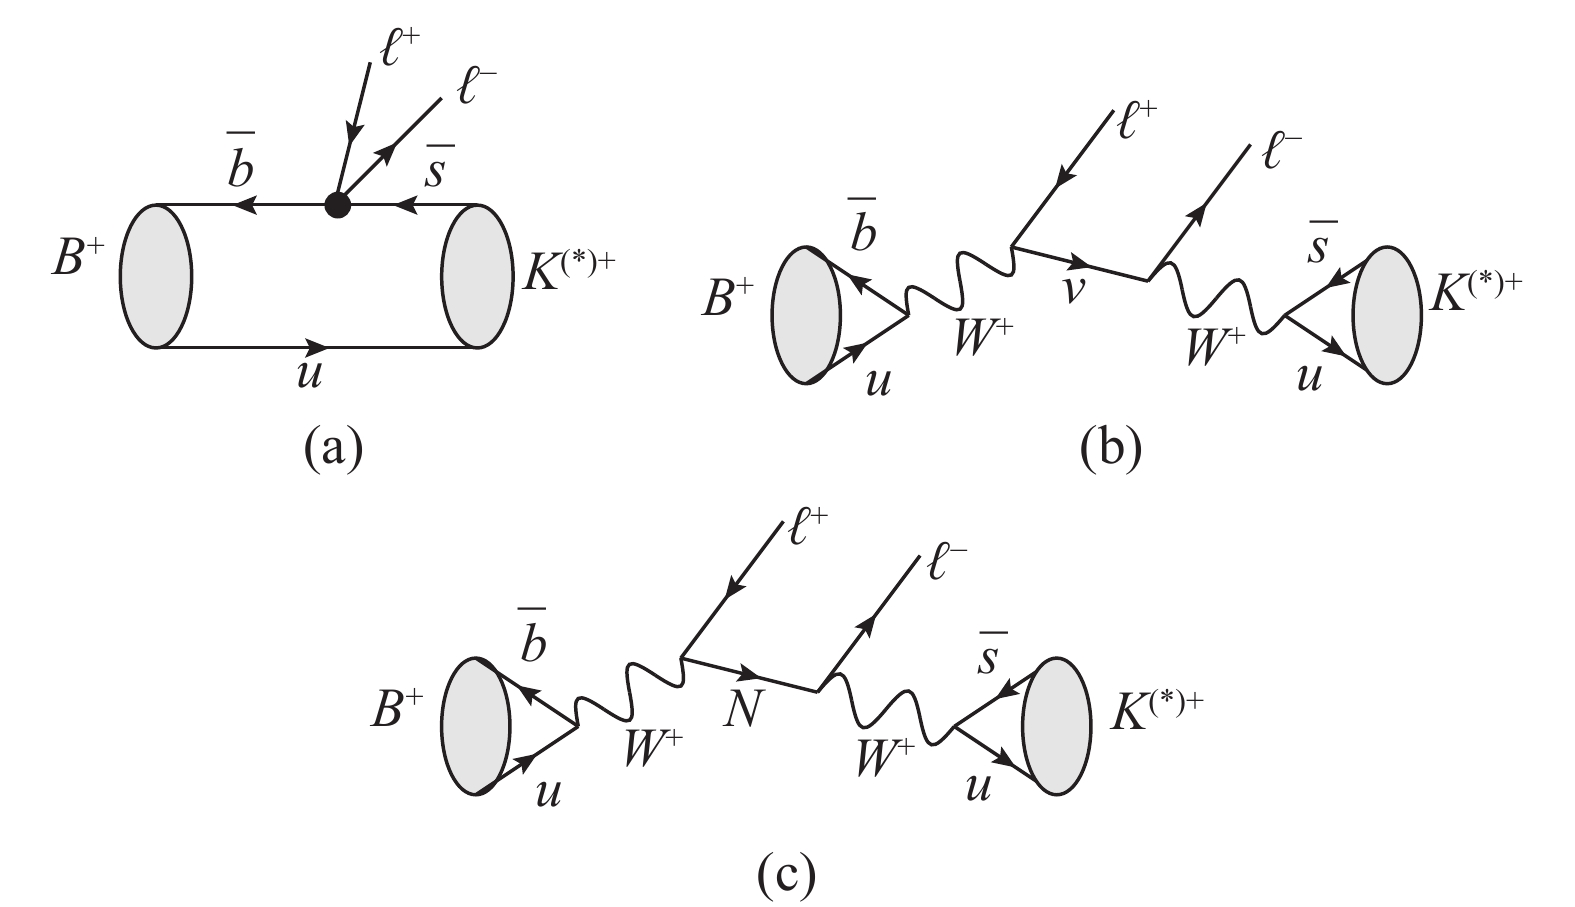
Figure 1. Feynman diagrams for the opposite-sign dilepton B meson rare decays
${B^{+}\to K^{(*)+}\ell^{+}\ell^{-}}$ . The solid circle stands for the effective vertex of the leading-order${b\to s\ell^+\ell^-}$ transition and N denotes the Majorana neutrino. -
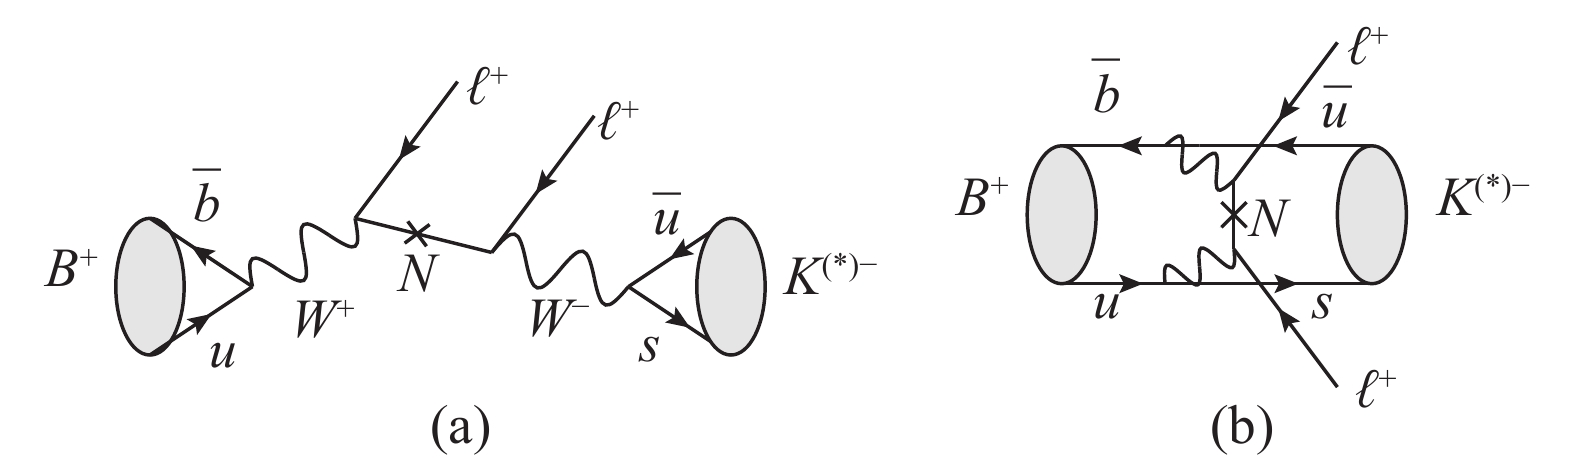
Figure 2. Feynman diagrams for
${B^{+}\to K^{(*)-}\ell^{+}\ell^{+}}$ via Majorana neutrino exchange. -

Figure 3. (a) The invariant mass distributions and (b) the angular distributions of the opposite-sign dilepton for
${{B}(B^{+}\to K^{(*)+}\mu^{+}\mu^{-})}$ in the SM. -
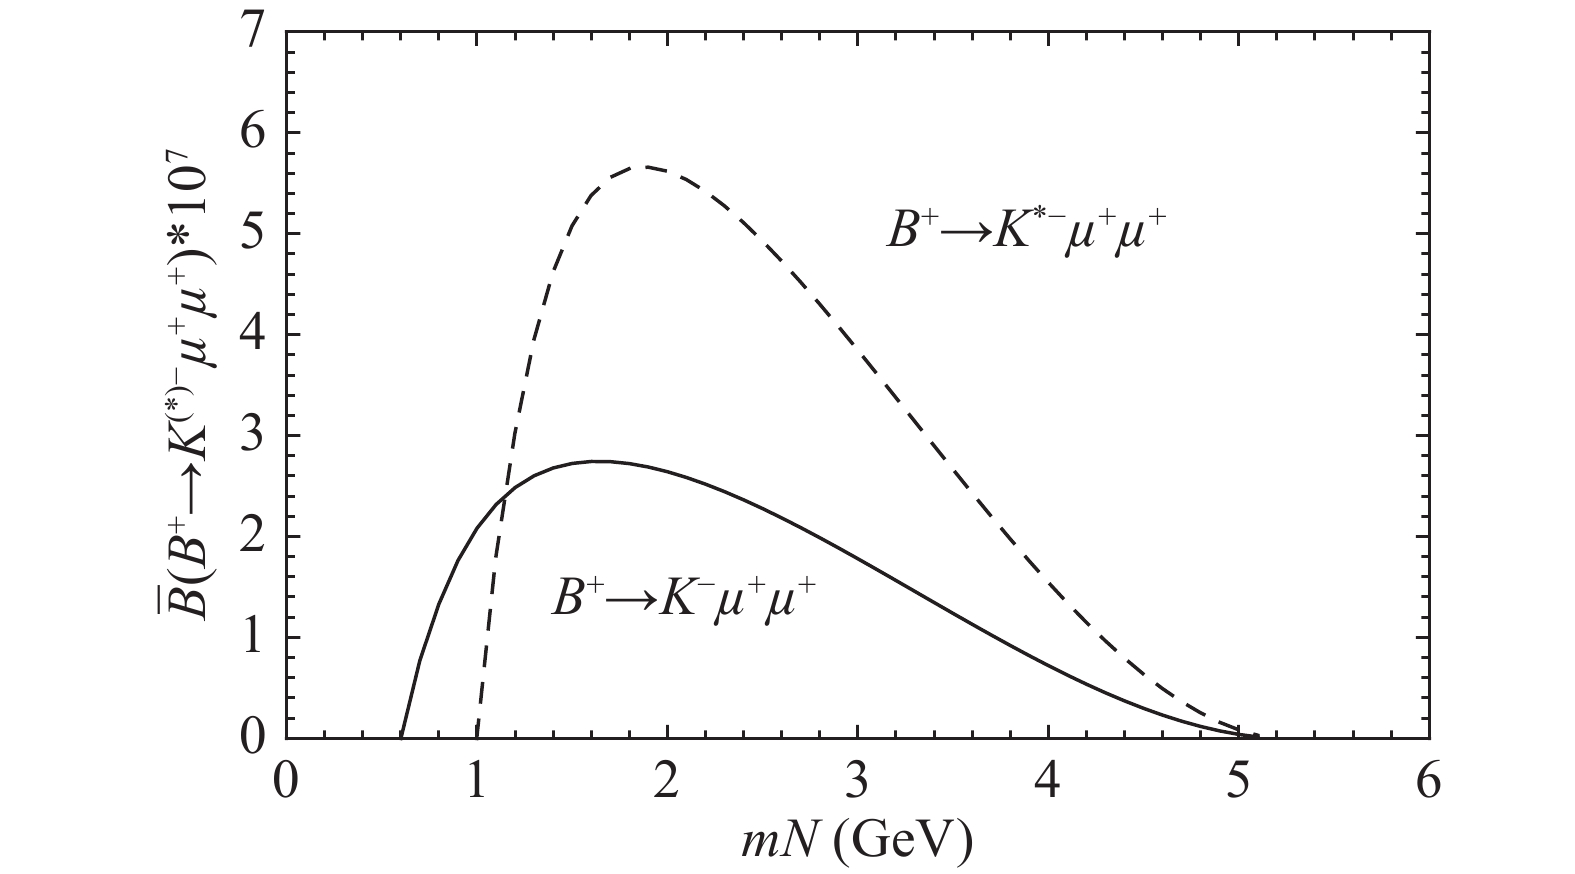
Figure 4. Simplified branching ratios
${\bar{{B}}(B^{+}\to K^{(*)-} \mu^{+} \mu^{+}) = }$ ${{B} (B^{+} \to K^{(*)-} \mu^{+} \mu^{+}) / |V_{\mu N}|^2}$ with respect to Majorana neutrino mass m N. -
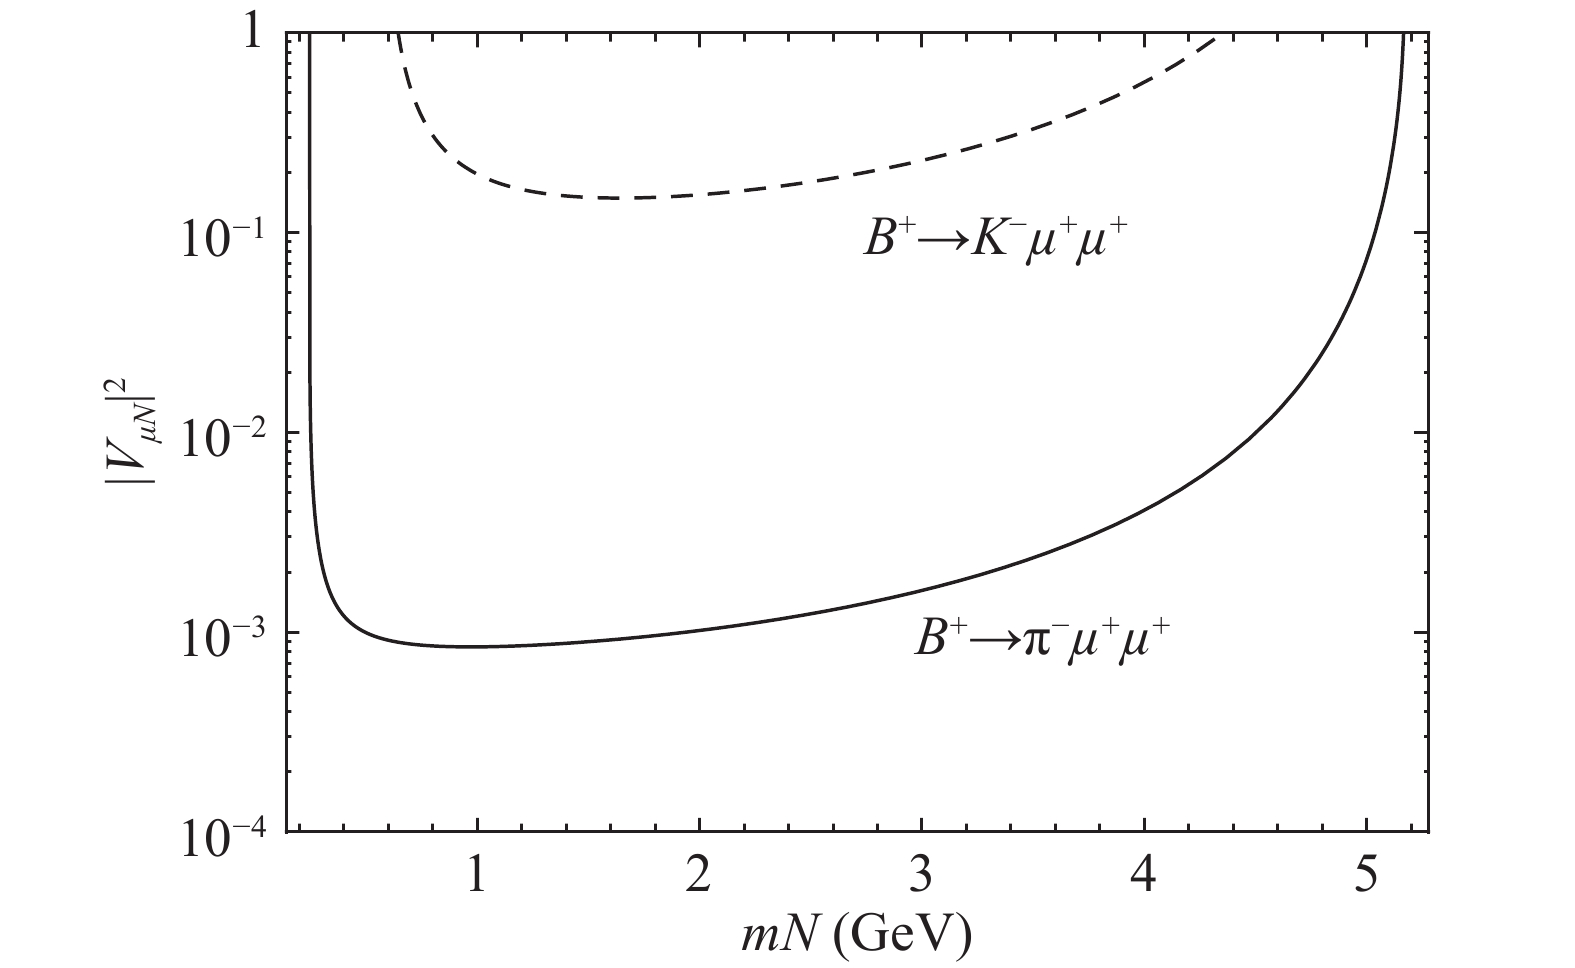
Figure 5. Contour plot obtained from the experimental upper limits for LNV rare decays
${B^{+}\to K^{-}\mu^{+}\mu^{+}}$ and${B^{+}\to \pi^{-}\mu^{+}\mu^{+}}$ . -
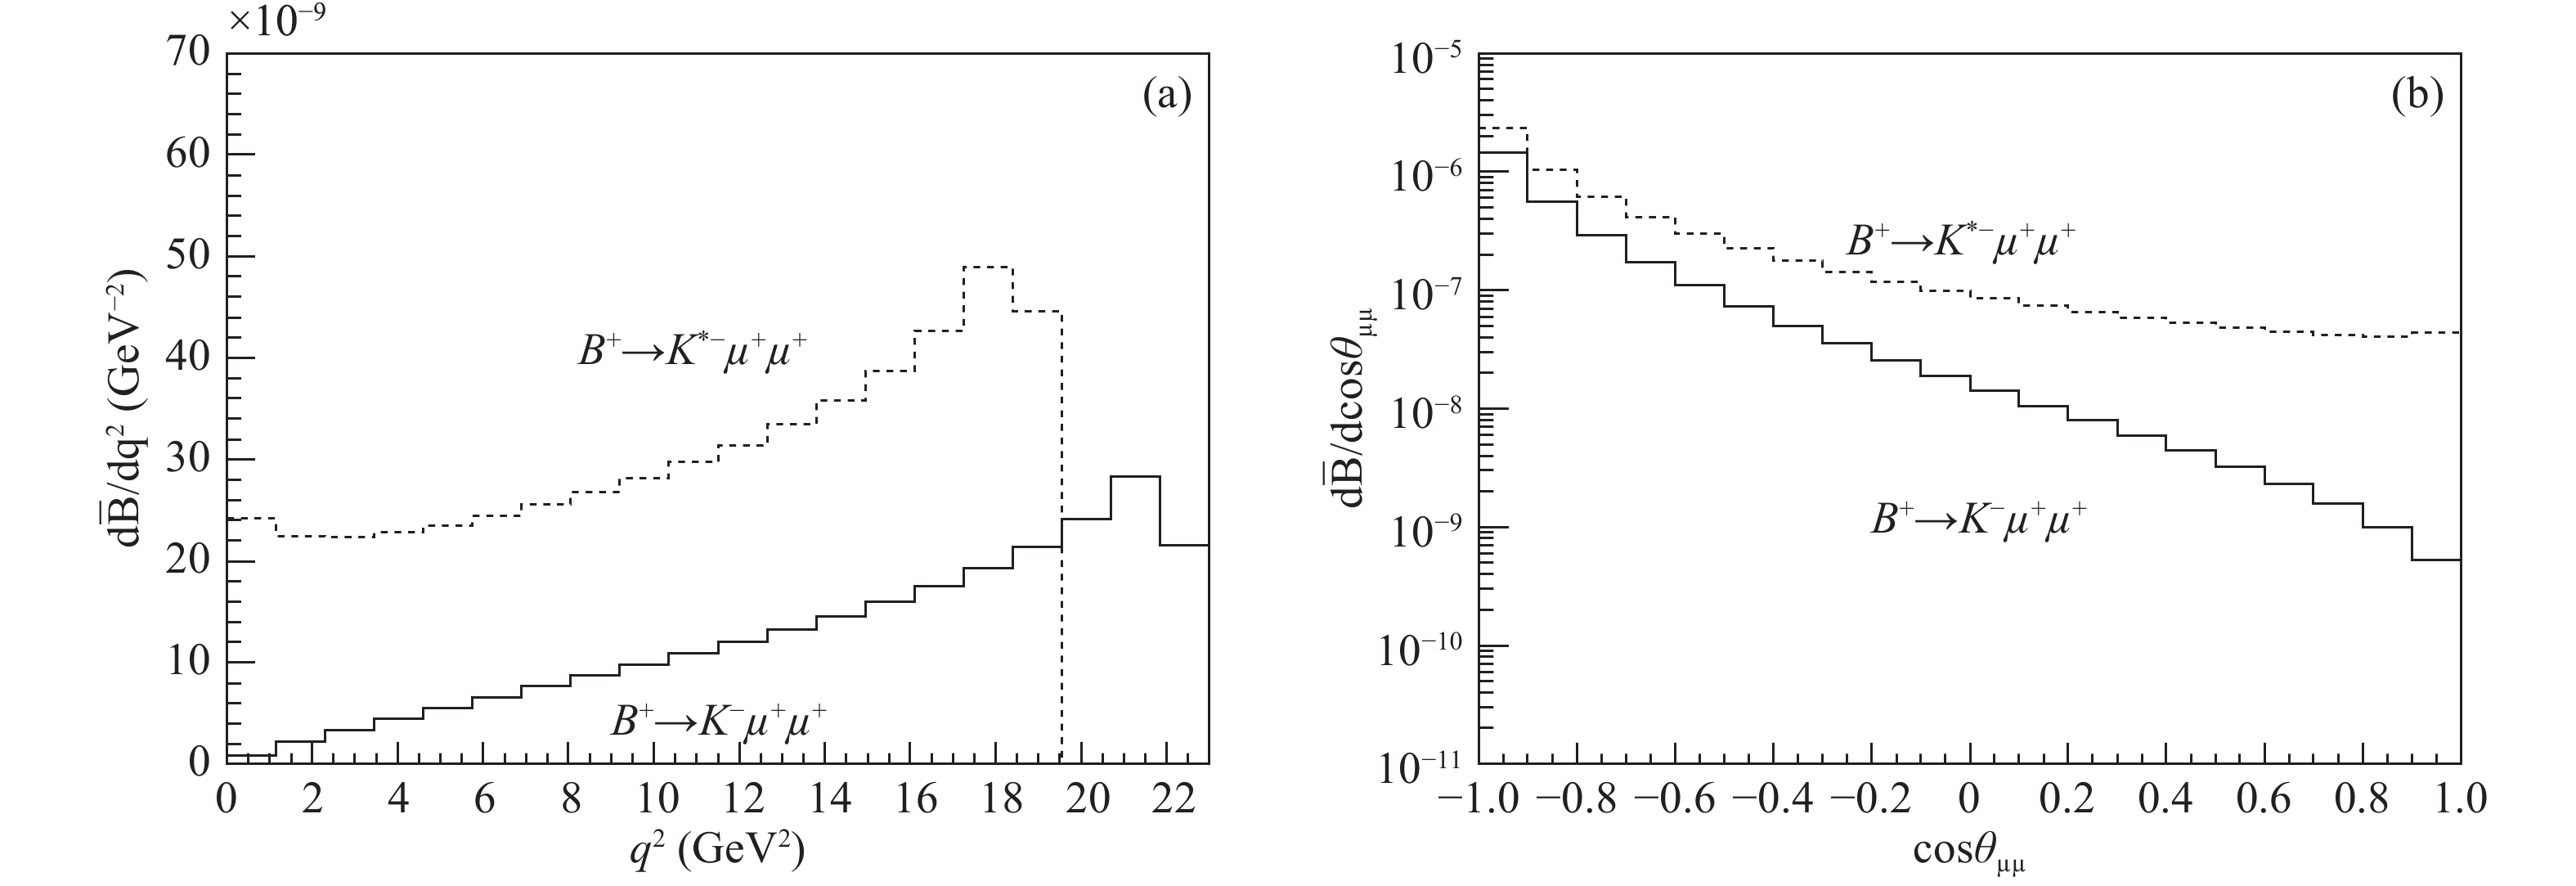
Figure 6. (a) The invariant mass distributions and (b) the angular distributions of the same-sign dilepton for
${\bar{\cal{B}}(B^{+}\to K^{(*)-} \mu^{+} \mu^{+})}$ with mN=2 GeV.
Figure
6 ,Table
5 个